 |
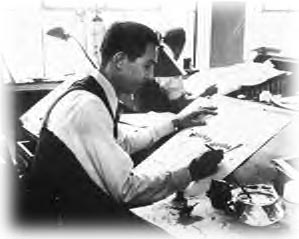
From the early years in Kansas City with the likes of Ub Iwerks, Hugh Harmon and Rudy Ising. Walt Disney went on to become the single most important man in the history of animation. His legacy is a veritable who's who of animated characters; Snow White, Donald Duck, Pinocchio, Alice, Bambi, Cinderella, and of course, Mickey Mouse.
2. The storyboards are presented as the story

4. After the dialogue is recorded, the animators can make rough sketches of just the characters. Usually these drawings are quite messy, there is still no color, or background. Some animated films have used over 50,000 individual drawings.

5. Once the entire film has been drawn on paper, the animation drawings go to the inking department. There, the inkers copy the animation drawings on to a clear celluloid acetate, sometimes called a Cel.
6. After the outline of the characters has been made, the unfinished Cel's go to the Painting Department. The painters flip the Cel over, and paint the colors on the back. They paint on the back so the characters appear crisp, and have an outline.
7. Before the Animation Cels get photographed a background must be added. Because a Cel is clear, and it only has the painted character on it, if a background is made, it will show through. Usually backgrounds are painted with Tempera or Water Color paint. Although, in some Disney productions, the background was painted on glass, and combined with other glass painted backgrounds to create the illusion of extreme movement. (This technique is use in Snow White and the Seven Dwarfs.)
8. Now all the combined elements (the Cel and the background) can be photographed. Although, the final product is not filmed with a normal projector, or camera. A special device, with a lens mounted facing down on to a table top captures each frame of the animated feature. Usually, the background is placed into a special mount, then covered with the Cel, then covered with a large piece of glass, then photographed.
9. After all the drawings have been filmed, the dialogue is added. Sometimes the film is edited at this step.
10. The animated film is released, and the general public may view it.
Photographs on this page © Disney


0 comments:
Post a Comment